飞牛OS虚拟机安装home assistant飞牛OS安装home assistant飞牛OS虚拟机安装HA
- 茶余饭后
- 2025-02-27
- 402热度
- 0评论
如何通过飞牛OS新出的虚拟机,安装部署智能家居平台homeassistant。
首先准备2个镜像文件
- 准备homeassistant镜像文件
首先,我们先去homeassistant官网,下载homeassistant的镜像文件。
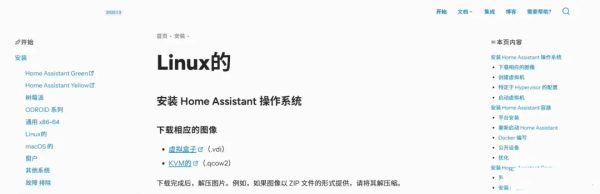
最好下载qcow2格式的镜像文件(下载完之后别忘了解压),后面的步骤,可以直接使用。
下载地址:https://www.home-assistant.io/installation/linux
- 准备飞牛OS的镜像文件
接着,直接到飞牛OS官网下载即可,如果有其他ISO格式的镜像文件也可以,不一定要飞牛OS的镜像文件。
创建虚拟机

首先打开飞牛OS的虚拟机;
点击右长角-新建虚拟机;
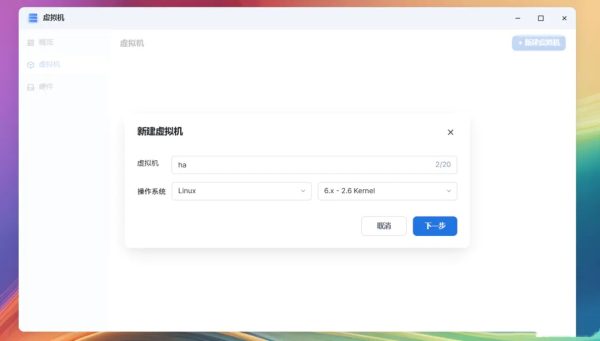
虚拟机的名称自定义即可,操作系统选择linux,然后下一步;

启动镜像,直接任意选择一个ISO镜像文件即可,没有直接使用刚才官网下载的飞牛OS的镜像,刚好是ISO格式的。
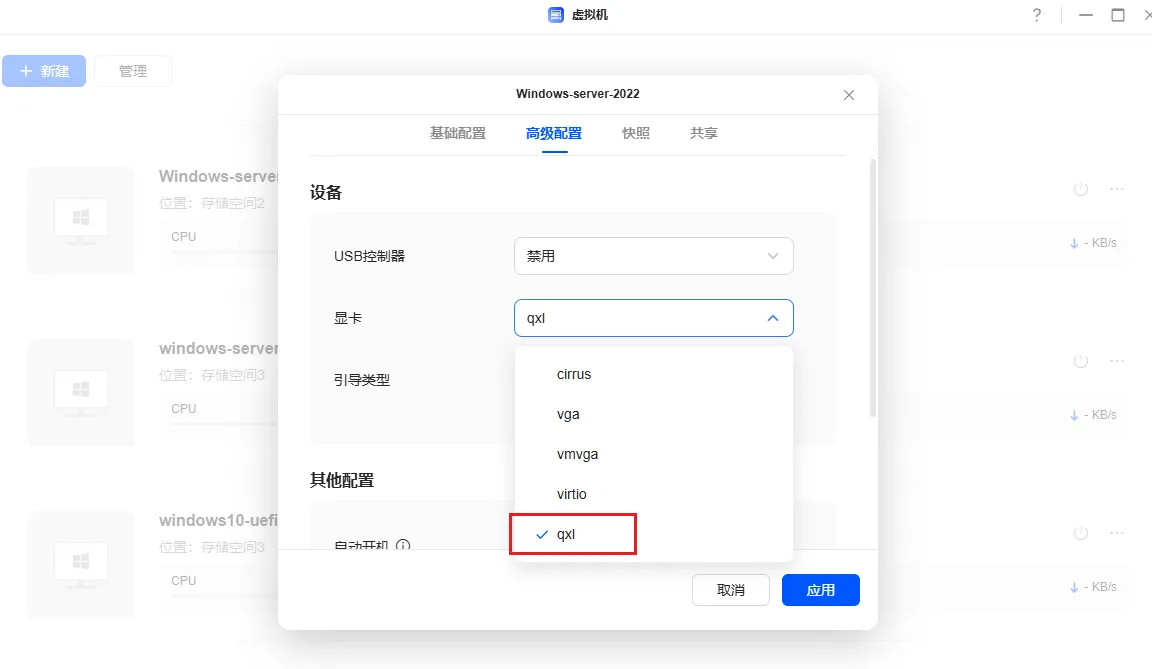
主板固件一定要修改成UEFI!!!
因为homeassistant目前只支持uefi启动,其他的内存核心,根据自己电脑配置,适当分配即可。然后下一步;
储存空间,根据自己电脑情况分配;

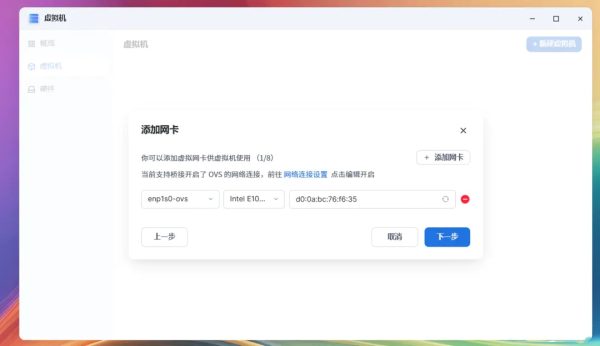
接着添加网卡,网卡类型最好选择e1000,兼容性更好一点;
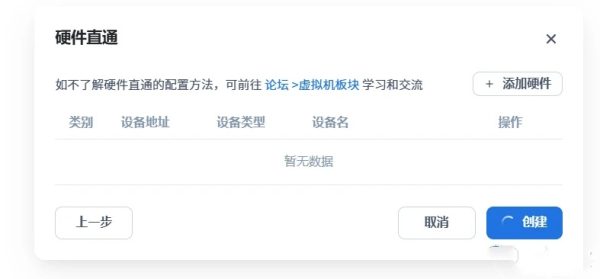
硬件直通,看自己需求,如果有USB的蓝牙,zigbee网关或者USB摄像头需要接入,就开启硬件直通。没有这方面需求,直接点击创建即可。
另外飞牛OS虚拟机的硬件直通教程,我也做了,有需要可以看下:https://www.wusteel.cn/1947/。
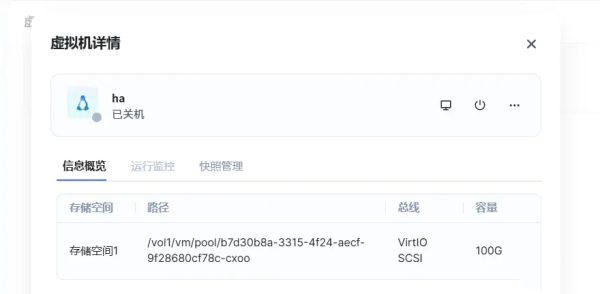
接着我们查看一下,homeassistant虚拟机的空间路径,这个下一步骤需要使用。
创建好homeassistant虚拟机以后,暂时不要开机。
修改SSH文件
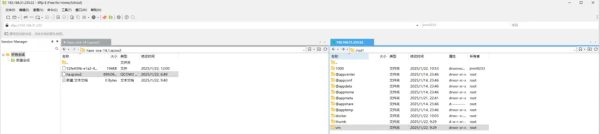
紧接着,我们需要一个SSH文件工具,连接homeassistant虚拟机的系统文件;
接着进入homeassistant虚拟机的空间路径,这时候我们可以看到一个默认文件。
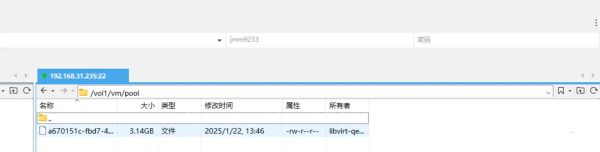
这时候,我们将提前下好的homeassistant镜像文件,传到homeassistant虚拟机的空间路径下;

接着我们将默认文件的名称复制下来,把默认文件删除;然后将传入的homeassistant镜像改成跟默认文件一模一样的名称;

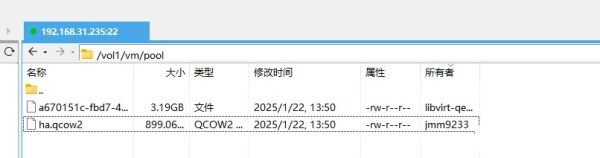
替换完镜像文件以后,接着我们通过ssh工具,切换到root用户。通过这串指令
sudo chown libvirt-qemu:libvirt-qemu 此文字替换你自己的文件名
将我们homeassistant改过名的镜像文件修改掉用户组。
这样的话就算完成了。
开机安装homeassistant
替换完镜像文件,修改完用户组以后,我们就可以回到飞牛OS,开机了;

然后通过VNC访问;

可以看到已经开始部署homeassistant了;
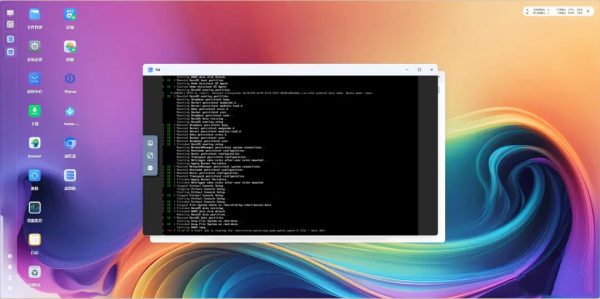
等待部署;

接着出现homeassistant的logo,并且出现了访问的ip地址,就成功了。
测试
浏览器输入IP+8123;

可以看到已经在准备homeassistant了,这一步需要等待,网好的话很快。
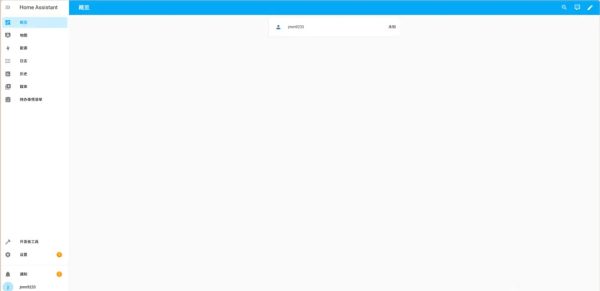
然后创建用户,就可以进入homeassistant了;
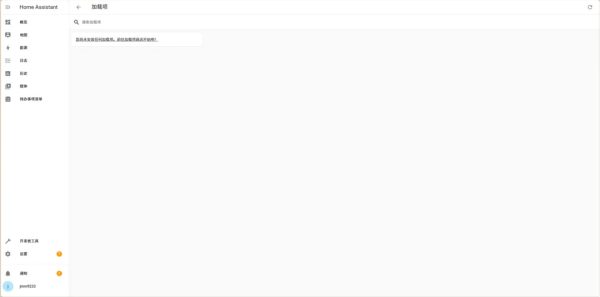
可以查看到,带加载项了。
最后
这样飞牛OS通过虚拟机部署homeassistant就算完成了,希望这篇内容对有相关需求的值友,有所帮助。